

How to Grow Your Own Chia Plants for Seeds at Home?
VitalFiberOne Naturals Inc. • March 28, 2024
Grow Chia Seeds at Home: A Step-by-Step Guide for Beginners

Are you looking to harness the nutritional powerhouse that is chia seeds straight from the comfort of your home? Growing chia plants for seeds is simpler than you might think. With some basic knowledge and a little patience, you can turn your green thumb into a treasure trove of these super seeds. Let’s embark on a journey to grow your own chia plants at home.
**1. Understanding Chia Plants**
Chia (Salvia hispanica) is a flowering plant native to central and southern Mexico, belonging to the mint family, Lamiaceae. Famous for their seeds, chia plants are praised for their nutritional value, high in omega-3 fatty acids, fiber, antioxidants, and proteins.
**2. Choosing the Right Spot**
Chia plants thrive in warm climates and need plenty of sunlight. When selecting a growing location, ensure it receives at least 4-6 hours of direct sunlight daily. Chia plants prefer a well-draining soil that retains moisture without becoming waterlogged.
**3. Planting Your Chia Seeds**
Spring is the best time to plant chia seeds directly into your garden. Sprinkle the seeds over the soil and lightly cover them with a thin layer of earth. Remember, chia seeds are small and should not be buried too deeply—about a quarter-inch is perfect.
**4. Watering Wisely**
Water your chia plants regularly. They like to stay moist but are also quite drought-tolerant once established. Ensure the soil is moist, especially during the germination phase, which usually takes 7 to 14 days.
**5. Fertilizing for a Bountiful Harvest**
Chia plants aren’t heavy feeders, but they do benefit from occasional fertilization. Use a balanced organic fertilizer to ensure your plants get the nutrients they need without the harsh chemicals.
**6. Managing Pests and Diseases**
Thankfully, chia plants are relatively pest-resistant . However, you will want to keep an eye out for slugs and snails, especially when your chia is young and tender. Use organic pest control methods, such as diatomaceous earth, to keep these critters at bay.
**7. Watching Them Grow**
As your chia plants grow, they’ll need some space to flourish. Thin your plants to about 12 to 18 inches apart. This gives each plant enough room to reach its full size. Healthy chia plants can grow up to 3 feet tall.
**8. The Flowering Stage**
When your chia plant blooms, it will display beautiful purple or white flowers. These flowers are pollinated by bees and after pollination, will develop into seed heads akin to tiny wheat heads.
**9. Harvesting Time**
Harvest time is typically in the fall when the flowers have matured and the petals have fallen, revealing the chia seeds. The seed heads should be brown before you harvest them. Cut the seed heads and let them dry in an airy, shaded place for a few days.
**10. Collecting Your Chia Seeds**
Once dry, you can extract the seeds by gently rubbing the heads between your hands over a container to catch the seeds. Be sure to remove any plant debris from your seeds.
**11. Storing Your Harvest**
Store your chia seeds in a cool, dry place. An airtight container in the refrigerator can keep them fresh for months, even years.
**12. Enjoying the Fruits of Your Labor**
You can now enjoy your own home-grown chia seeds! Use them in smoothies, yogurts, baking, or sprinkle over your salad for a crunchy, nutritious addition.
Growing chia plants at home is rewarding and adds a touch of sustainability to your lifestyle. Not only will the plants provide a plentiful supply of seeds, but you’ll also enjoy the stunning blooms throughout the growing season. The process is a beautiful integration of nature's cycle into your daily life and an excellent conversation starter about health and self-sufficiency.
As an expert in home gardening, my goal is to assure you that with these simple steps, you will be able to successfully grow and harvest chia seeds. It’s a journey worth embarking on for both novice and seasoned gardeners alike. Enjoy your horticultural adventure with these super seeds.
Remember, patience and consistent care are the main ingredients for a thriving chile plant. Start with quality seeds, provide the right conditions, and nature will do the rest. Here’s a summary of your chia growing journey:
**Quick Recap: Your Chia Growing Checklist**
- **Location**: Full sun, warm spot
- **Soil**: Well-draining, moisture-retentive
- **Planting**: ¼ inch deep, in spring
- **Watering**: Regularly, more during germination
- **Fertilizing**: Balanced, organic preferred
- **Thinning**: Space plants 12-18 inches apart
- **Flowering**: Late summer, requires pollination
- **Harvesting**: When seed heads turn brown
- **Drying and Collecting**: Dry seed heads, rub to release seeds
- **Storing**: Cool, dry place; airtight container
**Final Thoughts**
Gardening can be an enriching activity, and growing your own chia plants is a fantastic way to start. It brings the joy of growing your own food and the satisfaction of knowing where your nutrients come from. With each sprinkling of home-grown chia seeds, you'll taste the freshness and feel the fulfillment of your gardening success.
Remember that each climate can have peculiarities. Keep an eye on your local weather conditions and adapt your care accordingly. Gardening is as much about adaptation as it is about care.
**Join Our Green Thumb Community**
For readers who succeed in growing their own chia plants, how did you find the experience? Share your successes, challenges, and even your favorite chia recipes with us! Let's cultivate a community of home-garden enthusiasts and continue to grow together.
If you enjoyed this post or have additional questions, don't hesitate to reach out or comment below. Your engagement helps us create more informative and enjoyable content. Let's sow the seeds of knowledge and reap the benefits of nature's bounty together.
Grow your wellness, right where you live, with each tiny chia seed._
We hope this guide helps you turn your gardening aspirations into achievements. Take this information, plant your chia, and watch as your garden becomes a bastion of health and wellness.
Happy gardening!
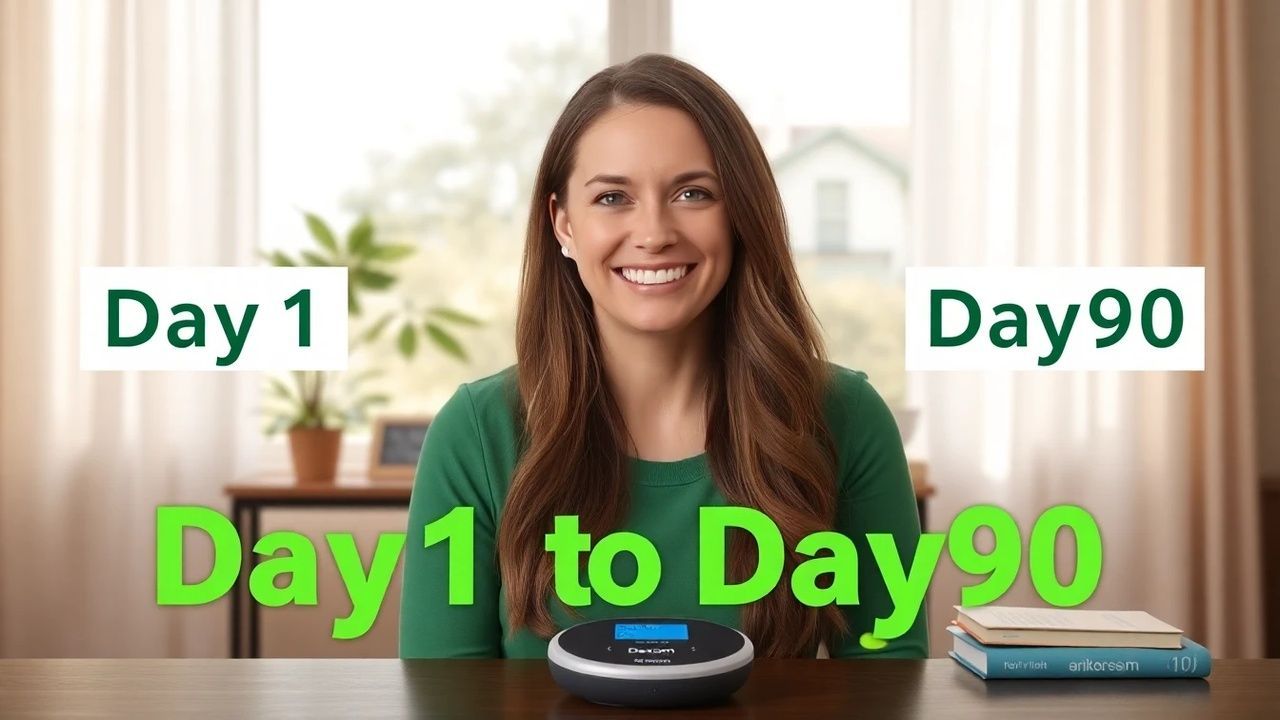
Discover my honest review of the Dexcom G8 after 90 days of continuous use. Uncover key pros, cons, practical insights, and determine if it’s the best CGM for your diabetes management.

Discover the best insulin pumps of 2025 in our detailed comparison of Omnipod 6 vs. Tandem T:slim X4. Find the perfect device to enhance your diabetes management.

Learn expert insulin injection techniques and avoid common mistakes for effective diabetes management. Trust VitalFiberOne for reliable solutions and improved health outcomes.
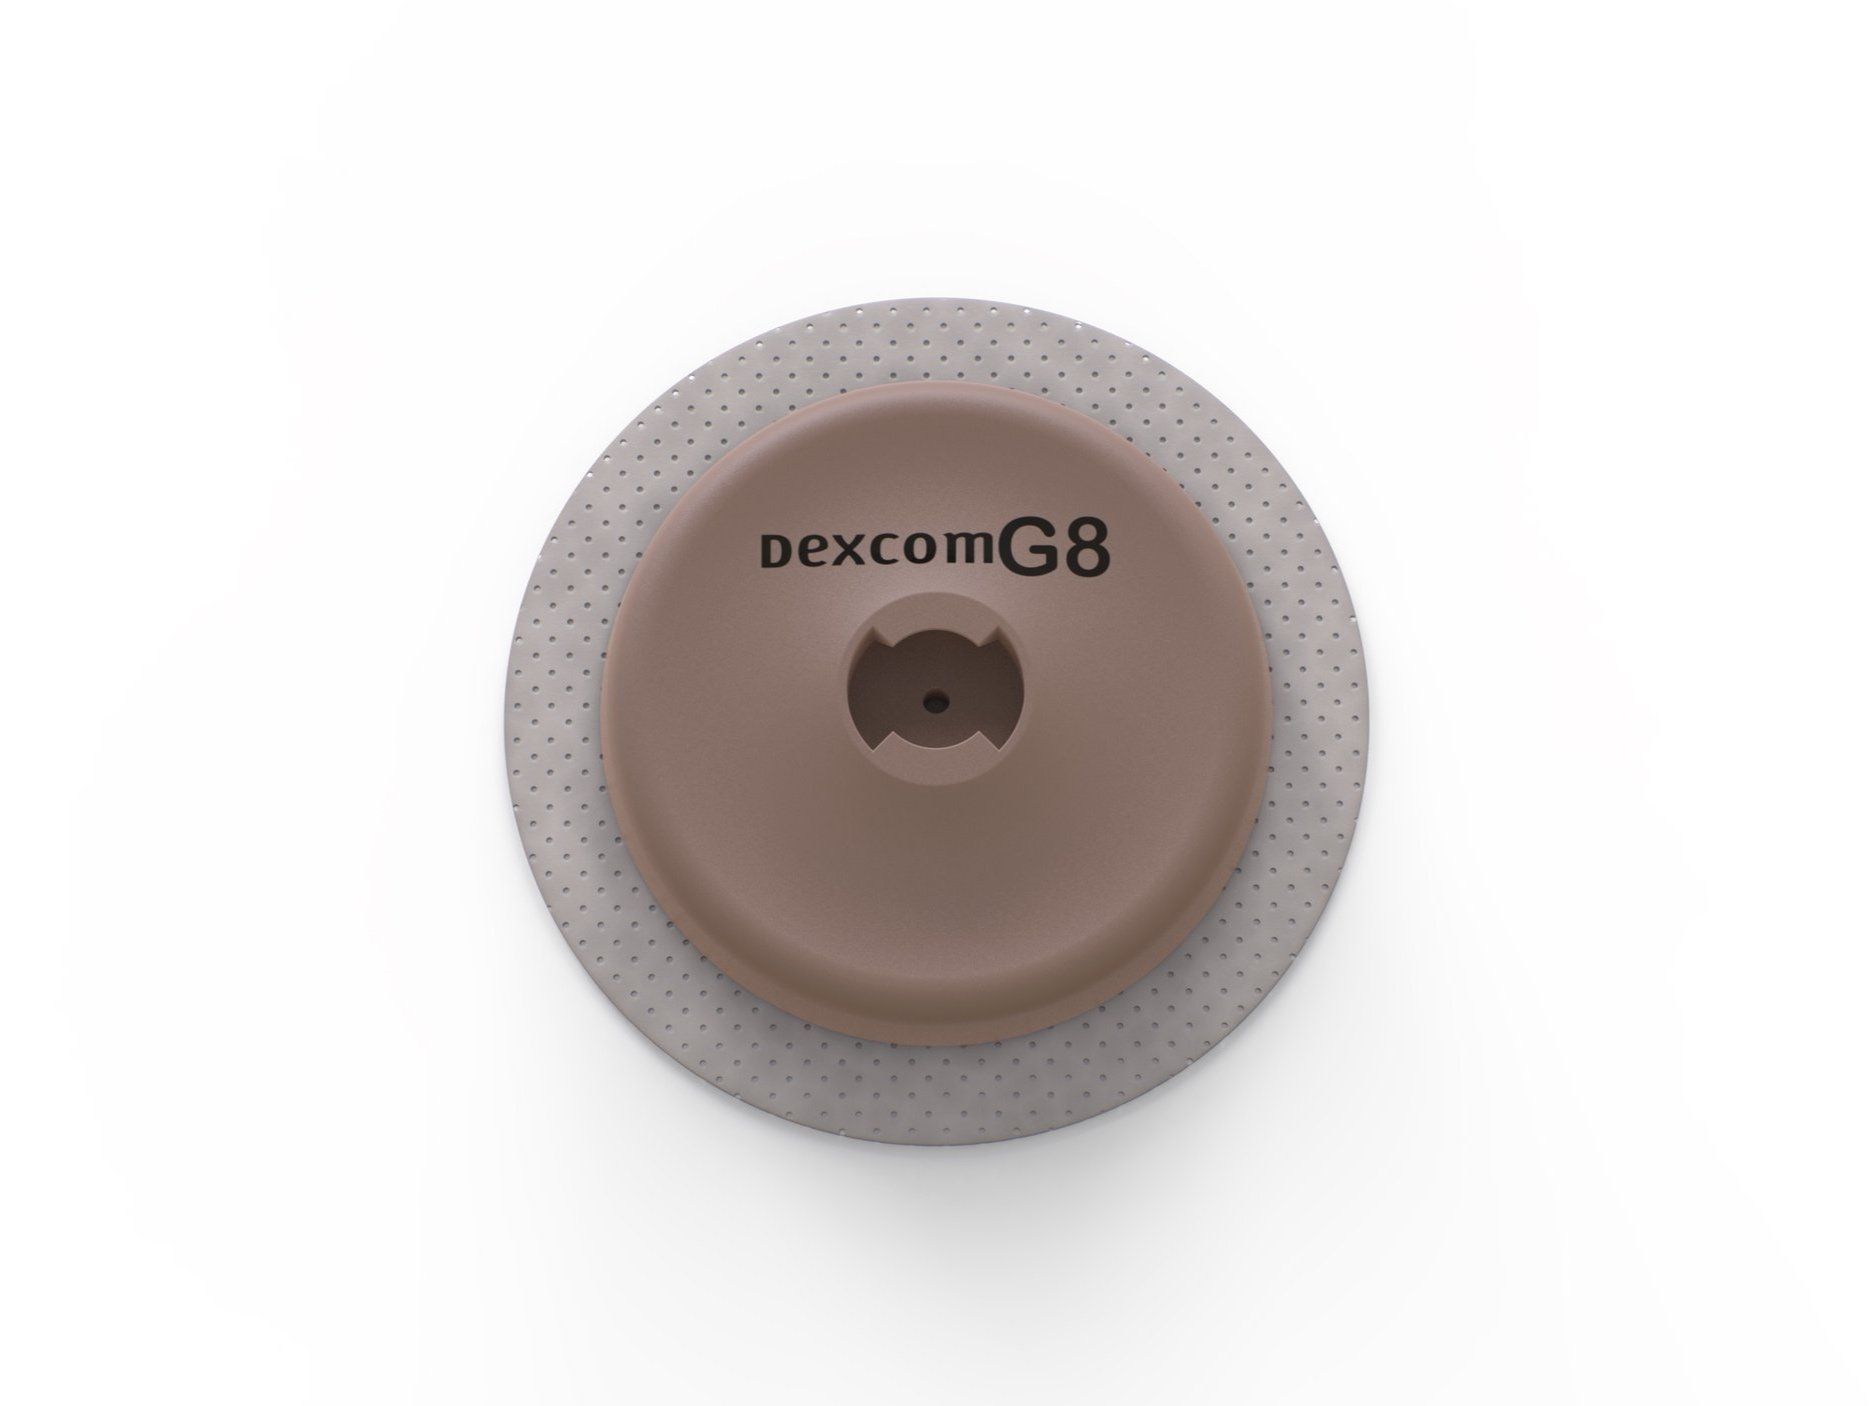
Continuous Glucose Monitors (CGMs) have transformed diabetes management by providing real-time glucose data, reducing the need for fingersticks, and enabling proactive treatment decisions. Among the leading CGMs are the Dexcom G8 and Medtronic Guardian 4, each offering unique features tailored to different user needs. This comprehensive comparison delves into their specifications, usability, accuracy, and integration capabilities to help you make an informed choice. Dexcom G8: Next-Generation Simplicity and Integration The Dexcom G8 represents Dexcom's latest advancement in CGM technology, building upon the strengths of its predecessors. Key Features Sensor Wear Time: 14 days Warm-Up Period: 30 minutes Calibration: Factory-calibrated; no fingersticks required Accuracy: Mean Absolute Relative Difference (MARD) of 8.2% Integration: Compatible with various insulin delivery systems and health apps Alerts: Customizable high and low glucose alerts Data Sharing: Real-time data sharing with caregivers via the Dexcom Follow app integrateddiabetes.com The G8's streamlined design and direct integration with smart devices, including Apple Watch, offer users a seamless experience. Its improved accuracy and reduced warm-up time enhance user confidence and convenience. Dexcom Medtronic Guardian 4: Precision and Pump Integration The Guardian 4 sensor is Medtronic's latest CGM, designed to work in tandem with their insulin pump systems, particularly the MiniMed™ 780G. Key Features Sensor Wear Time: 7 days Warm-Up Period: 2 hours Calibration: No fingersticks required Accuracy: MARD of 10.6% Integration: Seamless integration with Medtronic insulin pumps Alerts: Predictive alerts for impending highs and lows Data Sharing: Data viewable via CareLink™ Connect app The Guardian 4's strength lies in its integration with Medtronic's insulin pumps, enabling automated insulin delivery adjustments based on real-time glucose readings. This closed-loop system aims to maintain glucose levels within the target range more effectively. Side-by-Side Comparison Feature Dexcom G8 Medtronic Guardian 4 Sensor Wear Time 14 days 7 days Warm-Up Period 30 minutes 2 hours Calibration No fingersticks required No fingersticks required Accuracy (MARD) 8.2% % 10.6% Integration Multiple insulin delivery systems Medtronic insulin pumps only Alerts Customizable alerts Predictive alerts Data Sharing Dexcom Follow app CareLink™ Connect app Pros and Cons Dexcom G8 Pros: Longer sensor wear time reduces the frequency of replacements. Shorter warm-up period allows for quicker data availability. High accuracy enhances trust in glucose readings. Broad integration with various devices and apps offers flexibility. Cons: Integration with insulin pumps may require additional setup. Availability may vary by region and healthcare provider. Medtronic Guardian 4 Pros: Designed for seamless use with Medtronic insulin pumps, enabling automated insulin delivery. Predictive alerts provide early warnings for glucose excursions. No calibration required simplifies daily use. Cons: Shorter sensor lifespan necessitates more frequent replacements. Longer warm-up period delays initial data availability. Limited integration with non-Medtronic devices reduces flexibility. Dexcom User Experience and Testimonials Users of the Dexcom G8 appreciate its ease of use, accuracy, and the convenience of real-time data on their smart devices. The ability to share data with caregivers offers peace of mind, especially for parents of children with diabetes. Medtronic Guardian 4 users value the integration with Medtronic insulin pumps, noting improved glucose control and reduced manual interventions. However, some users mention the shorter sensor lifespan as a drawback. Conclusion Both the Dexcom G8 and Medtronic Guardian 4 offer significant benefits for diabetes management, but they cater to different user preferences and needs. Choose Dexcom G8 if you prioritize longer sensor wear time, quick setup, high accuracy, and flexibility in device integration. Choose Medtronic Guardian 4 if you are using or plan to use a Medtronic insulin pump and desire a fully integrated system with automated insulin delivery. Your choice should align with your lifestyle, treatment goals, and the devices you currently use or plan to use. Have you used the Dexcom G8 or Medtronic Guardian 4? Share your experiences and insights in the comments below. For more in-depth reviews and comparisons of diabetes management technologies, explore our other blog posts.

Ensure precise diabetes management with our expert tips on using your glucometer effectively for accurate blood glucose readings in 2025.

Learn how to manage diabetes with ease using VitalFiberOne™, a revolutionary solution that makes living with diabetes simple and stress-free. In this blog, we'll introduce you to a fun and interactive world education game that teaches you how to control your blood sugar levels, improve your overall health, and live a happy life with diabetes. Discover the benefits of VitalFiberOne™ and how it can help you take charge of your diabetes management.

Take control of your diabetes management with Glyco Guardian, the ultimate solution for a healthier you! In this blog, we'll show you how to make managing your diabetes easy, convenient, and most importantly, FREE! With Glyco Guardian, you'll have access to a comprehensive platform that helps you track your blood sugar levels, monitor your diet, and stay on top of your medication. Say goodbye to tedious paperwork and hello to a more streamlined approach to managing your diabetes. Join us as we explore the benefits of Glyco Guardian and discover how it can make a significant difference in your life.

Explore how fenugreek seeds naturally manage diabetes by improving insulin sensitivity, stabilizing blood sugar, and reducing cholesterol. Boost your health today!

Discover 5 surprising, science-backed foods to naturally stabilize your blood sugar. Learn how acacia fiber, cinnamon, apple cider vinegar, and more can help.

Uncover the shocking reality behind olive oil fraud affecting 75% of market products. Learn how to identify genuine extra virgin olive oil and protect your health.